Delight in Homegrown Potatoes: A Container Gardening Guide
Potatoes, whether baked, boiled, or turned into fries, are a cherished staple in many diets. But, there’s nothing quite like the taste of a freshly harvested potato from your own garden. This guide dives deep into the art of raising potatoes in containers.

1. Understanding the Potato Lifecycle
Each potato has a series of ‘eyes’ or small dimples. Under the right conditions, these eyes sprout. You might have seen this happen to an old potato in your pantry.
When planted, these sprouts transform into stems. As these stems grow, the energy they produce is pushed downwards, forming ‘tubers’ beneath the soil, which we recognize as potatoes.

2. Choosing the Right Potato Variety
In regions with shorter growing periods, such as Arizona’s low desert, “early” and “mid-season” determinate potatoes like Yukon Gold, Purple Viking, and All Red are best.
For those in areas with extended growing seasons, indeterminate or “late season” varieties like Russian Blue, Canela Russet, and Ramona are preferable. Always choose certified disease-free seed potatoes from reputable sources.
3. Prepping the Potato for Growth
Let seed potatoes sit in a space with temperatures between 60-70℉ and some light exposure. This encourages sprouting or ‘chitting’. For larger potatoes, once sprouted, cut them, ensuring each segment has 2-3 eyes.

4. Planning the Potato Planting
In chillier areas, begin planting right after the last frost. In warmer zones like Arizona’s low desert, you can plant from September to January. Keep an eye out for frost, as potatoes are susceptible to it.
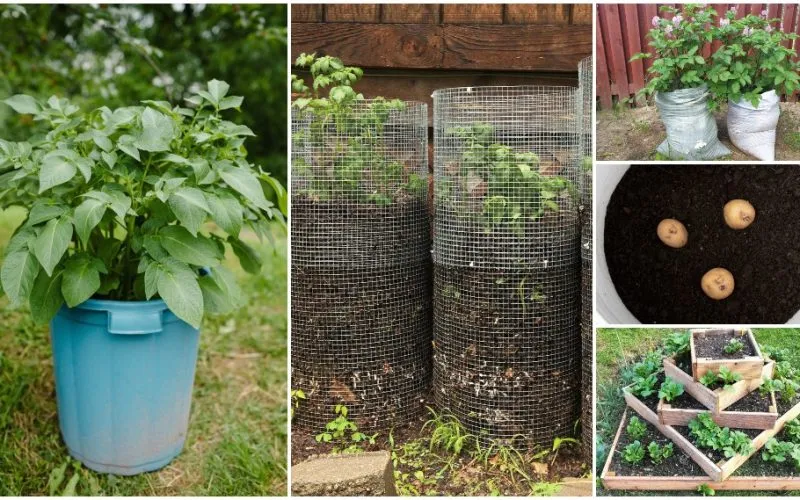
5. Choosing the Perfect Container
Potatoes aren’t picky about their homes. Whether it’s a trash can, compost sack, or burlap bag, they’ll thrive. The popular choice is the 40-gallon grow-bag. No matter the container, follow basic planting instructions for best results.
6. Determining Potato Quantity
Match the number of seed potatoes to the container size. Remember, a single potato plant needs about 3 gallons for optimal growth. Too many potatoes can mean smaller yields.
7. Proper Potato Planting Technique
Start with a 3-4 inch layer of aerated soil mixed with compost. Potatoes love slightly acidic soil. Depending on your soil, you might want to add an acid mix fertilizer.

Put the seed potatoes, sprouted side up, and cover them with 2-3 more inches of soil. As they grow, continue covering them until the container is filled, ensuring the potatoes remain in the dark, which encourages more growth and prevents greening.
8. Maintaining Moisture Levels
Potatoes need regular moisture, especially when grown in containers. Consider a drip line for consistent watering. The soil should be damp, not waterlogged. A straw layer can help keep the moisture in. Additionally, add an acid-friendly organic fertilizer or seaweed extract occasionally.
9. Picking the Perfect Spot for Your Container
Potatoes require at least 6 hours of sunlight daily. Depending on the season and region, afternoon shade might be beneficial.
10. Harvesting at the Right Time
Determinate potatoes are ready 60-90 days after planting, while indeterminate ones need 100-120 days. Feel around a stem to check potato size.
Harvest ‘new’ potatoes shortly after flowering. For a bigger harvest, wait for the plant to yellow and wilt. For storage, allow potatoes to stay in the soil for an extra 2 weeks after the plants die. When harvesting, handle with care to avoid bruising or cuts.
Enjoy the fruits (or tubers) of your labor promptly if they’re new potatoes. Mature, undamaged potatoes can be stored longer.
Raising potatoes in containers is a fulfilling experience. With these steps, you’re well on your way to enjoying homegrown potatoes. Happy gardening!
Your article helped me a lot, is there any more related content? Thanks!