Groceries are expensive. Anymore, I find myself spending $50 to “pick up a few” things when it used to cost around $20. Curbing my food waste is more important than ever these days. Take grapes, for example.
I stopped buying grapes because we couldn’t eat them all before they would go bad.
I couldn’t justify spending $7-$10 on food when I knew I was going to throw half of it away.
But my youngest son loves grapes in his bento box, and they’re one of the few fruits that I can pack that don’t require a lot of fuss. They don’t need to be cut or peeled. They won’t turn brown by the time he eats lunch. They’re kind of the perfect fruit for lunch boxes.
So, I started trying different things in an effort to make the grapes last beyond a week.
I washed them with fancy produce soap. I stored them in the crisper drawer. I stored them in the back of the fridge and even in the fridge door. Nothing seemed to work well.
At some point, I started storing them in a container to prevent them from being squished by anything else packed around them in the fridge. In doing so, I accidentally stumbled upon the perfect way to store grapes.
Using my method, I have unexpectedly kept grapes perfectly plump and juicy for up to a month before we ate the last little bunch.
We forgot about them, and when I pulled the container from the fridge, I expected to find a moldy mess. So, you can imagine my surprise when I opened the container to find perfectly edible grapes still.
If you’re tired of your grapes going bad within a matter of days, keep reading. I’ve got the perfect solution, and it all starts in the grocery store.
How to Choose Good Grapes

This is where it all starts. If you buy grapes that are already on the decline, then there isn’t much you can do but eat them quickly and hope for the best.
I don’t spend a ton of time poking or prodding. Instead, I look for three things when picking out a bag of grapes.
The stems

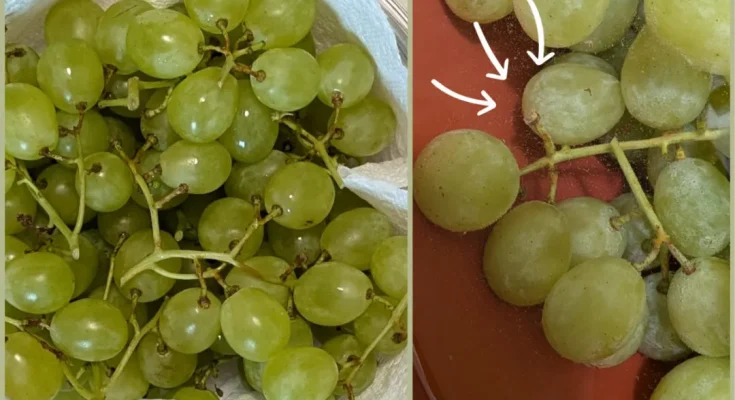
This is by far the most important thing you can look at when choosing grapes. You want to pick grapes that still have green stems. If the stems are brown and shriveled, then the grapes are already too far gone.
Brown spots

I will give the grapes a quick visual inspection to look for soft brown spots. If a few grapes have soft spots, it’s not a big deal. (We’ll deal with them later.) But if the grapes have been squished together in shipping and many of them are damaged, then skip them.
The bottom of the bag
I always look at the bottom of the bag to see if it’s sticky or to see if there are smashed grapes. The juice from squished grapes will pool on the bottom of the bag. Again, you’ll want to skip these.
In the end, you want green stems, firm grapes and few bruises.
Inspect and Wash Your Grapes at Home
Once you’re home, take the grapes out of the bag and inspect the clusters. Remove any damaged grapes that have split open or are too soft.

I like to cut the stems apart into smaller single-serving-sized clusters now. Doing so makes washing and storing them easier, plus it’s nice to reach into the fridge and grab a handful without having to cut or pull them apart.

Put the grapes in a colander and rinse them with lukewarm water using your sink sprayer. This is going to remove any residual juice from grapes that broke open during shipping, which will keep them from attracting bugs and rotting.
Place the grapes in a large bowl and fill the bowl with cold water, covering them completely. Sprinkle one tablespoon of baking soda over the grapes and gently swirl the water. Let them sit in the baking soda water for three minutes.

Add two tablespoons of white vinegar to the water, gently swirling to mix everything again. Let the grapes continue to soak for another three minutes.

The baking soda helps to remove residual pesticides. The vinegar helps to break down the natural yeasts on the skins of the grapes.
These can begin to ferment (spoil) in certain conditions. I’ve found that they taste better, too, as removing the yeast makes the skins less tart.
Remove the grapes to a colander and rinse them well with cold water using your sink sprayer. (You can run them under cold water if you don’t have a sprayer.) Gently shake as much water off the grapes in the colander as possible.

Spread the little clusters of clean grapes out on a clean dishtowel. Let them sit to dry for half an hour to an hour.
Storing Your Grapes

You’ll need an airtight container that can hold all of your grapes without squishing them. Use more than one container if you need to. Place a paper towel in the bottom of the container and place the grapes on top of it. Layer your grapes so they’re snug but not smashed together. If necessary, split them among several containers.

Finally, place another paper towel on top of the grapes, tucking the corners of the paper towel down inside the container around the grapes. Place the lid on the container and store your grapes in the fridge towards the bottom and near the front of the shelf.
Replace the paper towels once a week or if you open the container and notice that the paper towels are quite damp.
Make sure the paper towels are inside the container when you close it, not sticking out. They help to absorb excess moisture inside the container, which prevents the grapes from spoiling.
That’s all there is to it.
I know it sounds like a lot of fuss, but give it a try, and I think you’ll find that it’s worth the extra effort. You end up with tastier grapes that stay fresh for much longer. And between you and me, I’d rather spend a few more minutes washing and prepping my grapes than throwing them out ten days later because they’ve already gone bad.
Now that you’ve conquered grapes learn how to store salad greens for up to two weeks!


